基本的なCRUDアプリケーション
基本的なCRUDアプリケーションにSocket.IO(またはプレーンなWebSockets)を使用するのは少々大げさに聞こえるかもしれませんが、すべてのユーザーに簡単に通知できる機能は非常に強力です。
このガイドでは、素晴らしいTodoMVCプロジェクトをベースにした、基本的なCRUD(Create/Read/Update/Deleteの略)アプリケーションを作成します。
以下のトピックについて説明します。
始めましょう!
インストール
コードは、メインリポジトリの`examples`ディレクトリにあります。
git clone https://github.com/socketio/socket.io.git
cd socket.io/examples/basic-crud-application/
2つのディレクトリが表示されます。
フロントエンドの実行
このプロジェクトは、Angular CLIを使用して作成された基本的なAngularアプリケーションです。
実行するには
cd angular-client
npm install
npm start
ブラウザでhttps://:4200を開くと、以下が表示されます。
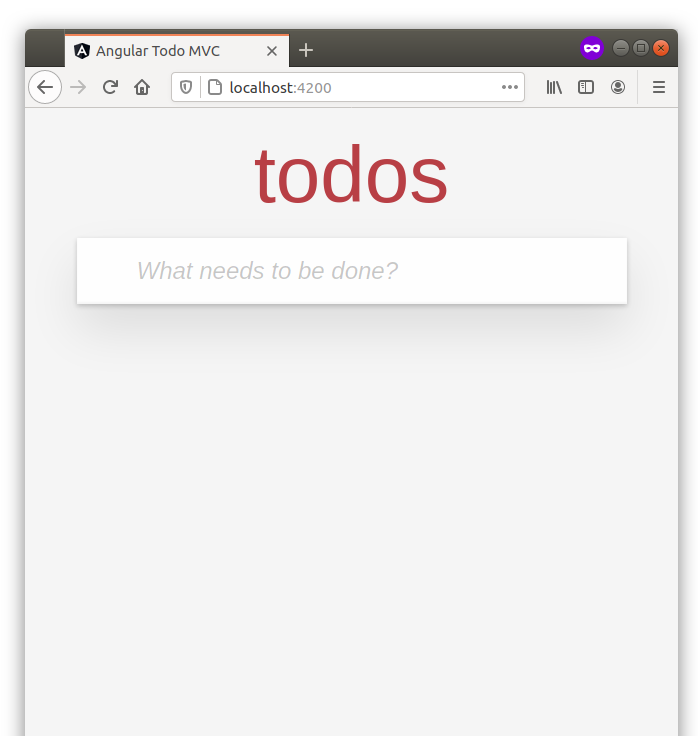
今のところは順調です。
サーバーの実行
今度はサーバーに注目しましょう。
cd ../server
npm install
npm start
複数のタブを開くと、Todoのリストがそれらの間で魔法のように同期されます。
動作方法
サーバー構造
├── lib
│ ├── index.ts
│ ├── app.ts
│ ├── todo-management
│ │ ├── todo.handlers.ts
│ | └── todo.repository.ts
│ └── util.ts
├── package.json
├── test
│ └── todo-management
│   └── todo.tests.ts
└── tsconfig.json
各ファイルの役割を詳しく説明しましょう。
- `index.ts`:コンポーネントを作成し、アプリケーションを初期化するサーバーのエントリポイント
- `app.ts`:Socket.IOサーバーが作成され、ハンドラーが登録されるアプリケーション自体
- `todo.handlers.ts`:Todoエンティティに対する操作のハンドラー
- `todo.repository.ts`:データベースからTodoエンティティを永続化/取得するためのリポジトリ
- `util.ts`:プロジェクトで使用される共通のユーティリティメソッド
- `todo.tests.ts`:統合テスト
初期化
まず、`lib/app.ts`ファイルの`createApplication`メソッドに注目しましょう。
const io = new Server<ClientEvents, ServerEvents>(httpServer, serverOptions);
次のオプションを使用してSocket.IOサーバーを作成します。
{
  cors: {
    origin: ["https://:4200"]
  }
}
そのため、`https://:4200`で提供されるフロントエンドアプリケーションが接続できるようになります。
ドキュメント
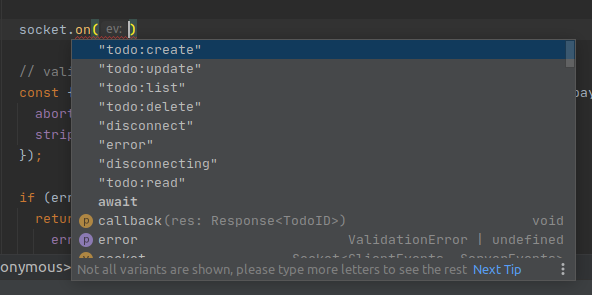
`<ClientEvents, ServerEvents>`の部分は、TypeScriptユーザー向けです。これにより、サーバーとクライアント間で交換されるイベントを明示的に指定できるため、コード補完と型チェックが可能です。

私たちのアプリケーションに戻りましょう!次に、アプリケーションコンポーネントを注入してハンドラーを作成します。
const {
    createTodo,
    readTodo,
    updateTodo,
    deleteTodo,
    listTodo,
} = createTodoHandlers(components);
そして、それらを登録します。
io.on("connection", (socket) => {
  socket.on("todo:create", createTodo);
  socket.on("todo:read", readTodo);
  socket.on("todo:update", updateTodo);
  socket.on("todo:delete", deleteTodo);
  socket.on("todo:list", listTodo);
});
ドキュメント:イベントのリスニング
注:イベントサフィックス(`:create`、`:read`など)は、REST APIの通常のHTTP動詞に置き換えられます。
- `POST /todos` => `todo:create`
- `GET /todos/:id` => `todo:read`
- `PUT /todos/:id` => `todo:update`
- ...
イベントハンドラー
今度は、`lib/todo-management/todo.handlers.ts`ファイルの`createTodo`ハンドラーに注目しましょう。
まず、Socketインスタンスを取得します。
createTodo: async function (
  payload: Todo,
  callback: (res: Response<TodoID>) => void
) {
  const socket: Socket<ClientEvents, ServerEvents> = this;
  // ...
}
アロー関数(`createTodo: async () => {}`)を使用するとここでは機能しません。`this`がSocketインスタンスを指さないためです。
次に、優れた`joi`ライブラリを使用してペイロードを検証します。
const { error, value } = todoSchema.tailor("create").validate(payload, {
  abortEarly: false, // return all errors and not just the first one
  stripUnknown: true, // remove unknown attributes from the payload
});
ドキュメント:https://joi.dev/api/
検証エラーがある場合、確認コールバックを呼び出して返します。
if (error) {
  return callback({
    error: Errors.INVALID_PAYLOAD,
    errorDetails: error.details,
  });
}
そして、クライアント側でエラーを処理します。
// angular-client/src/app/store.ts

this.socket.emit("todo:create", { title, completed: false }, (res) => {
  if ("error" in res) {
    // handle the error
  } else {
    // success!
  }
});
ドキュメント:確認応答
ペイロードがスキーマに正常に一致した場合、新しいIDを生成してエンティティを永続化できます。
value.id = uuid();

try {
  await todoRepository.save(value);
} catch (e) {
  return callback({
    error: sanitizeErrorMessage(e),
  });
}
予期しないエラーが発生した場合(たとえば、データベースがダウンしている場合)、一般的なエラーメッセージを使用して確認コールバックを呼び出します(アプリケーションの内部を公開しないため)。
そうでない場合は、新しいIDを使用してコールバックを呼び出します。
callback({
  data: value.id,
});
そして最後に(これが魔法の部分です)、作成について他のすべてのユーザーに通知します。
socket.broadcast.emit("todo:created", value);
ドキュメント:イベントのブロードキャスト
クライアント側では、このイベントのハンドラーを登録します。
// angular-client/src/app/store.ts

this.socket.on("todo:created", (todo) => {
  this.todos.push(mapTodo(todo));
});
そして、* voilà *!
テスト
私たちはかなりまともな開発者なので、ハンドラーにいくつかのテストを追加しましょう。`test/todo-management/todo.tests.ts`ファイルを開きましょう。
アプリケーションは`beforeEach`フックで作成されます。
beforeEach((done) => {
  const partialDone = createPartialDone(2, done);

  httpServer = createServer();
  todoRepository = new InMemoryTodoRepository();

  createApplication(httpServer, {
    todoRepository,
  });

  // ...
});
そして、ペイロードを送信するためのクライアントと、通知を受信するためのクライアントの2つを作成します。
httpServer.listen(() => {
  const port = (httpServer.address() as AddressInfo).port;
  socket = io(`https://:${port}`);
  socket.on("connect", partialDone);

  otherSocket = io(`https://:${port}`);
  otherSocket.on("connect", partialDone);
});
重要な注記:これらの2つのクライアントは`afterEach`フックで明示的に切断されるため、プロセスが終了するのを妨げません。
ドキュメント:https://mocha.dokyumento.jp/#hooks
最初のテスト(ハッピーパス)は非常に簡単です。
describe("create todo", () => {
  it("should create a todo entity", (done) => {
    const partialDone = createPartialDone(2, done);

    // send the payload
    socket.emit(
      "todo:create",
      {
        title: "lorem ipsum",
        completed: false,
      },
      async (res) => {
        if ("error" in res) {
          return done(new Error("should not happen"));
        }
        expect(res.data).to.be.a("string");

        // check the entity stored in the database
        const storedEntity = await todoRepository.findById(res.data);
        expect(storedEntity).to.eql({
          id: res.data,
          title: "lorem ipsum",
          completed: false,
        });

        partialDone();
      }
    );

    // wait for the notification of the creation
    otherSocket.on("todo:created", (todo) => {
      expect(todo.id).to.be.a("string");
      expect(todo.title).to.eql("lorem ipsum");
      expect(todo.completed).to.eql(false);
      partialDone();
    });
  });
});
無効なペイロードでもテストしましょう。
describe("create todo", () => {
  it("should fail with an invalid entity", (done) => {
    const incompleteTodo = {
      completed: "false",
      description: true,
    };

    socket.emit("todo:create", incompleteTodo, (res) => {
      if (!("error" in res)) {
        return done(new Error("should not happen"));
      }
      expect(res.error).to.eql("invalid payload");
      // check the details of the validation error
      expect(res.errorDetails).to.eql([
        {
          message: '"title" is required',
          path: ["title"],
          type: "any.required",
        },
      ]);
      done();
    });

    // no notification should be received
    otherSocket.on("todo:created", () => {
      done(new Error("should not happen"));
    });
  });
});
`npm test`を使用して、完全なテストスイートを実行できます。
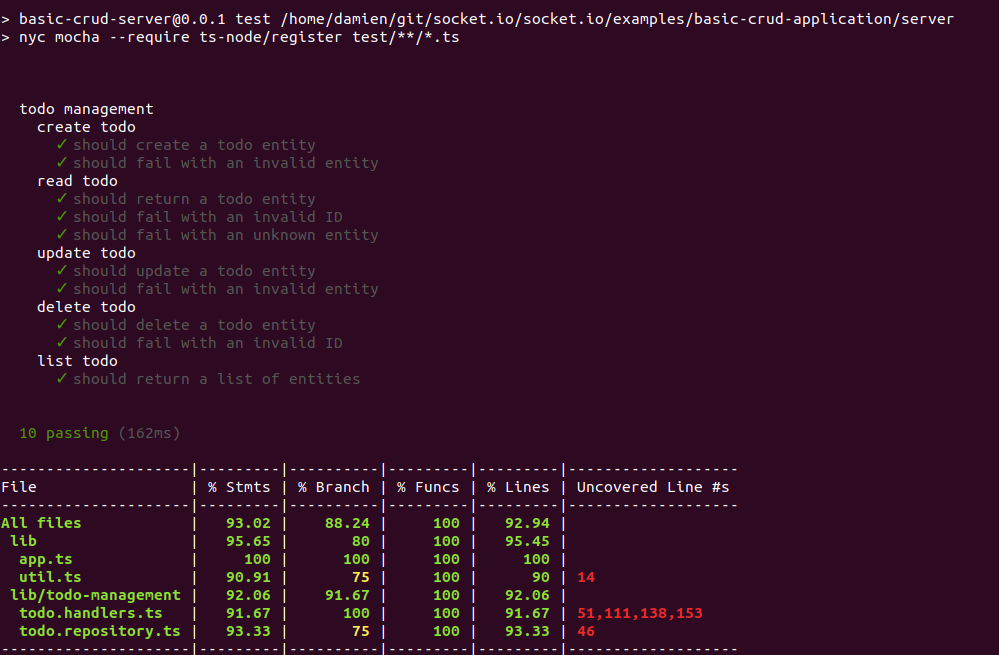
以上です!他のハンドラーは最初のハンドラーと非常に似ており、ここでは詳しく説明しません。
次のステップ
読んでいただきありがとうございます!